We can deliver your Garage Door Seals to most places in the world
How to Fit Garage Door Floor Seals
A brilliant way to easily seal your garage door is through the use of a garage door floor seal. The great thing about a door floor seal is that they can easily be put down without much hassle, and no annoying screws or fittings! We believe this is one of the most effective and easy garage door seals we have available. The garage door floor seal is effective for many reasons: preventing draughts, insulation, energy saving, water and leaves blocking, and even dust prevention. These multi-purpose seals are a must.
Starting off, ensure that your garage door area is clean and tidy. Don't let any mess, dust, pebbles or whatever sit around the place where the door floor seal will be. When fitting the garage door floor seal, you should begin by measuring the width of the garage, bearing in mind that you will need to fit the floor seal around the door frame. From there, you can cut the seal down to size (remember to be careful to not cut it too short, and bear in mind the door frame) by measuring it up against the space and marking with a pencil either end. It can be cut down with a sharp hacksaw, Stanley knife or anvil cutter.
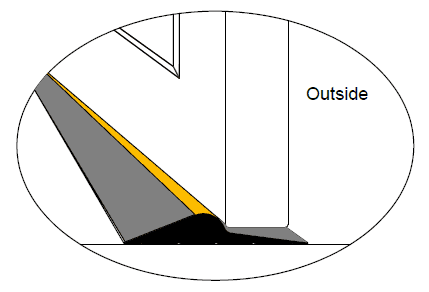
The floor seal will need to go on the inside of the garage door. With the garage door closed, place the floor seal in place, sliding the narrow end underneath the door, allowing the thicker end to be the blocker. If it slots nicely, and you're happy, then use a marker to line the length of the floor seal on the inside, then the outside, so you know exactly where it goes. About 1cm inside the lines you've just drawn, put some Polyurethane adhesive either side, doing a zigzag line in the midsection. The grooves at the bottom of the floor seal should allow for a good grip and sealant. From there, you should slowly and carefully place the garage door floor seal starting with one end, and pressing it down slow as you go along. Leave this to set for 24 hours, not touching or treading on it until it is set.
Check out our brief step by step diagrams below to make sure you understand. Or give us a call, we'd be happy to help!
- STEP 1 Measure the overall width of the garage door opening (brick to brick) and trim if needed, Remember you will have to cut the seal to fit around the door frame.
- STEP 2 Offer the ends of the seal against the door frame to work out how to cut the recess at each end of the seal, mark with a pencil where to cut the seal using either a Hacksaw, Stanley Knife or Anvil Cutters.
- STEP 3 Place the door seal up against the INSIDE of the garage door in its closed position and push the thinnest part of the seal under the door. Once you are happy with the position mark along the length of the seal with a pencil, then open the door and carefully mark along the outside edge of the seal.
- STEP 4 Using the Polyurethane adhesive apply a line of adhesive roughly 1cm inside the lines, then apply a zig zag line of adhesive in between.
- STEP 5 Start from one end and press the floorseal down into the sealant working your way along the length of the seal, clean any sealant residue and allow to set for 24 hours.